Let's connect Connections Online and QlikView!
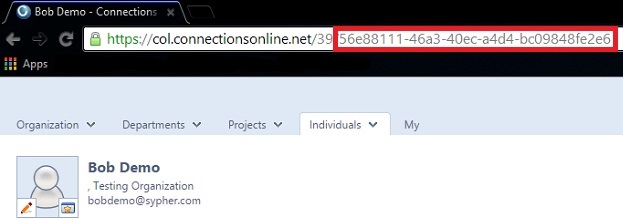
Next we need to go into Connections Online and get a UserID. Please note that you will not be able to read another person's data unless you have permission to view that data in Connections Online. In order to retrieve the person's ID you will want to log into connections online and go to that individual’s page. Once there copy and paste their ID from the URL, it should look similar to the screenshot. Now that you have the ID, save it in a safe place and let's open QVSource.
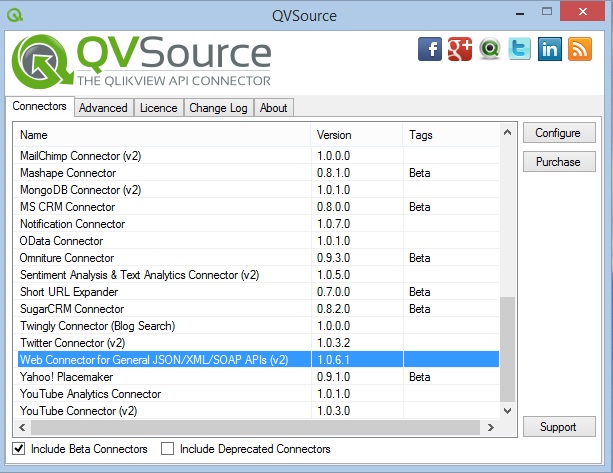
Once open it will bring up a list of all the connectors you can use to get data. Near the bottom of the list is "Web Connector for General JSON/XML/SOAP APIs (v2)". Select this one and click Configure.
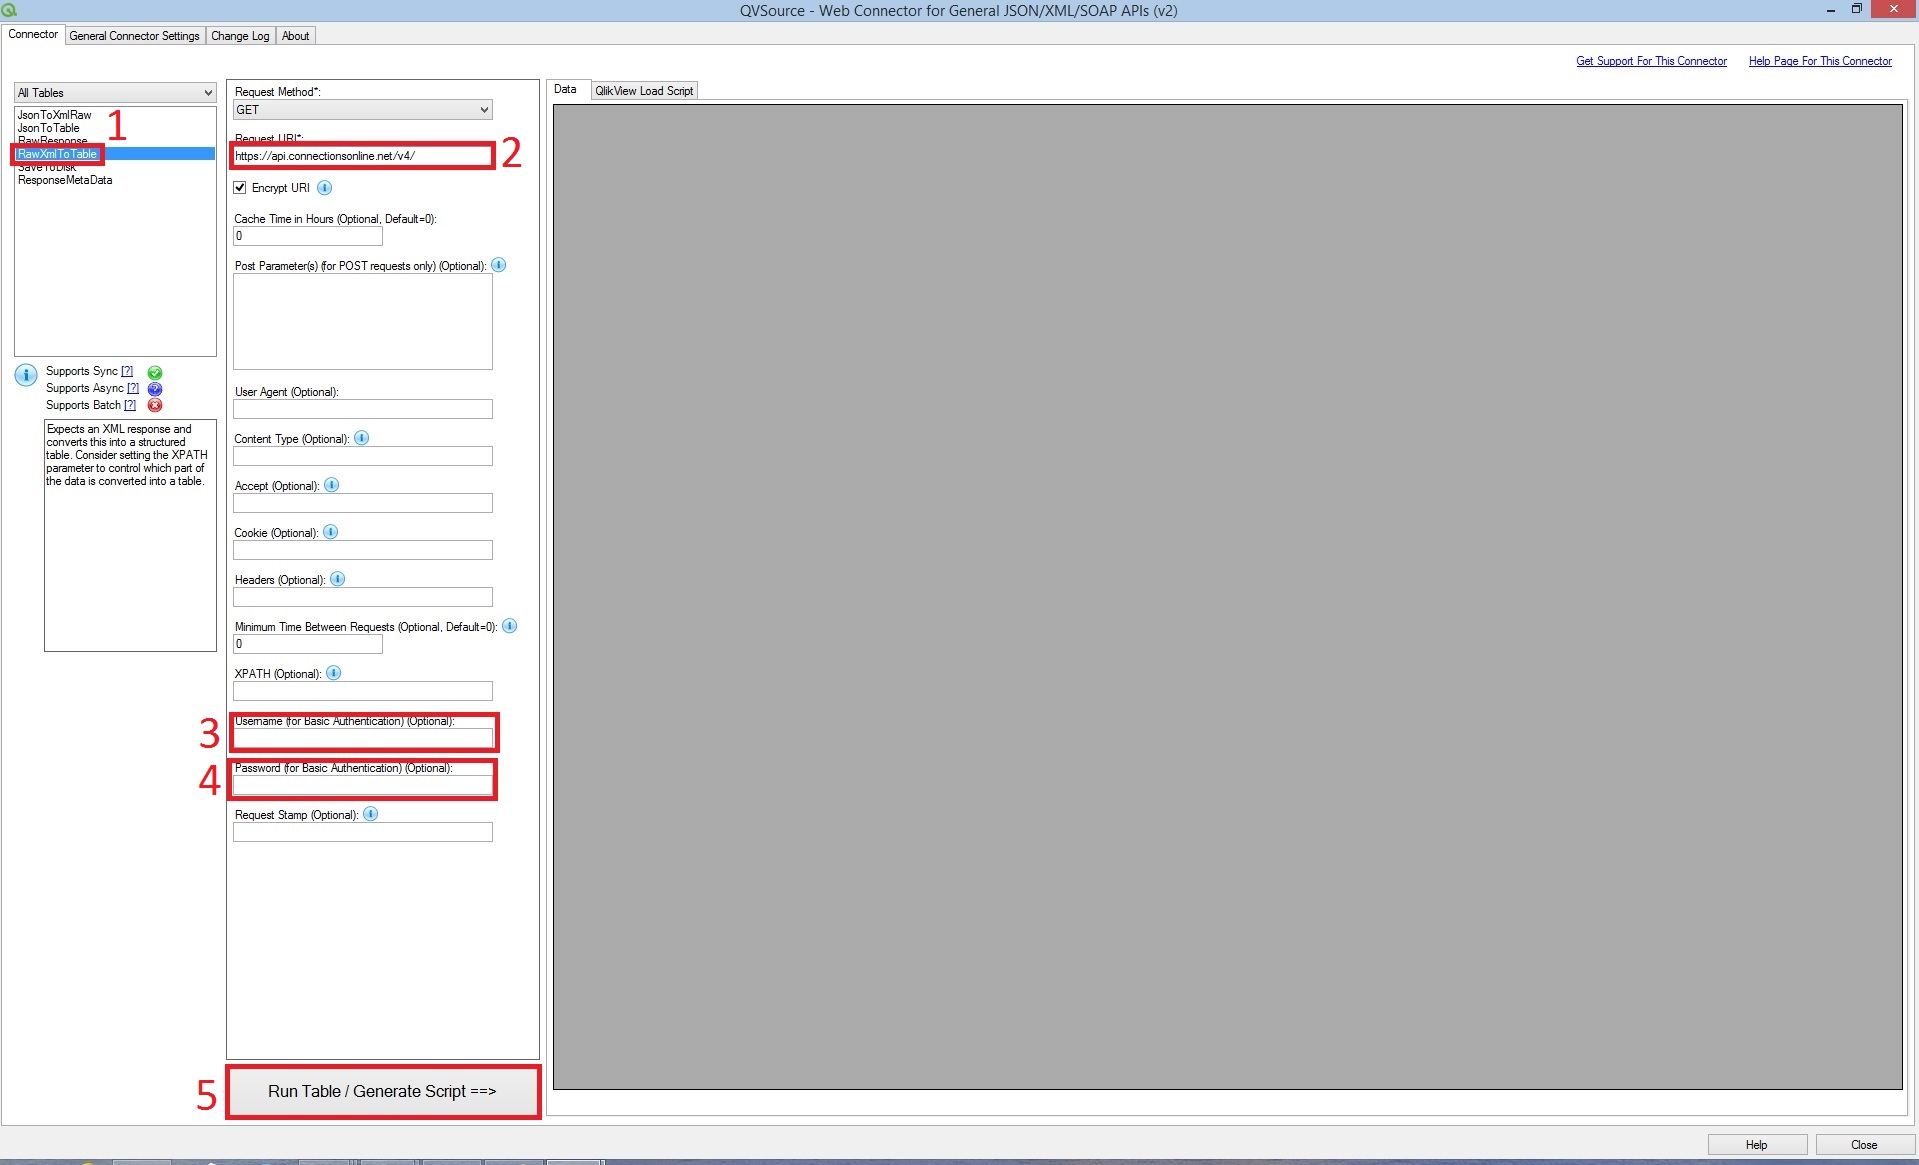
On the configuration screen you will see many options. Most of these you can skip for now. For this example just follow the numbers.
1. This area allows you to choose the format you want your data return in. We will select "RawXml TO Table".
2. This box is the place for your Request URI. We will be getting back a list of personal tasks so our URI will be https://api.connectionsonline.net/v4/UserID/tasks Change the UserID to the ID you retrieved from Connections Online in step 2 and put that full URI into the box. My URI is https://api.connectionsonline.net/v4/individuals/56e88111-46a3-40ec-a4d4-bc09848fe2e6/allTasks.
3 & 4 This is where you enter your Connections Online UserName and Password.
5. Finally just click this box and it should retrieve all the tasks for the individual you passed in.
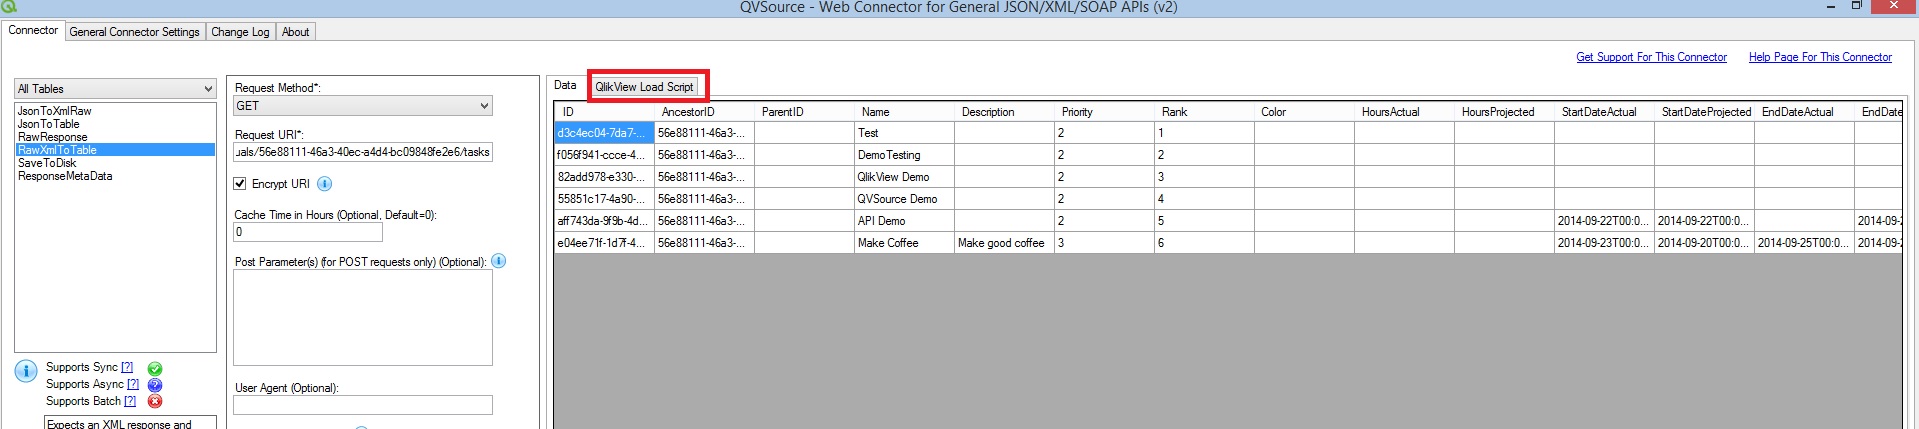
After you import the data it will come back as a table in the data window. This is what will be imported into QlikView, if everything looks alright then click "QlikView Load Script".
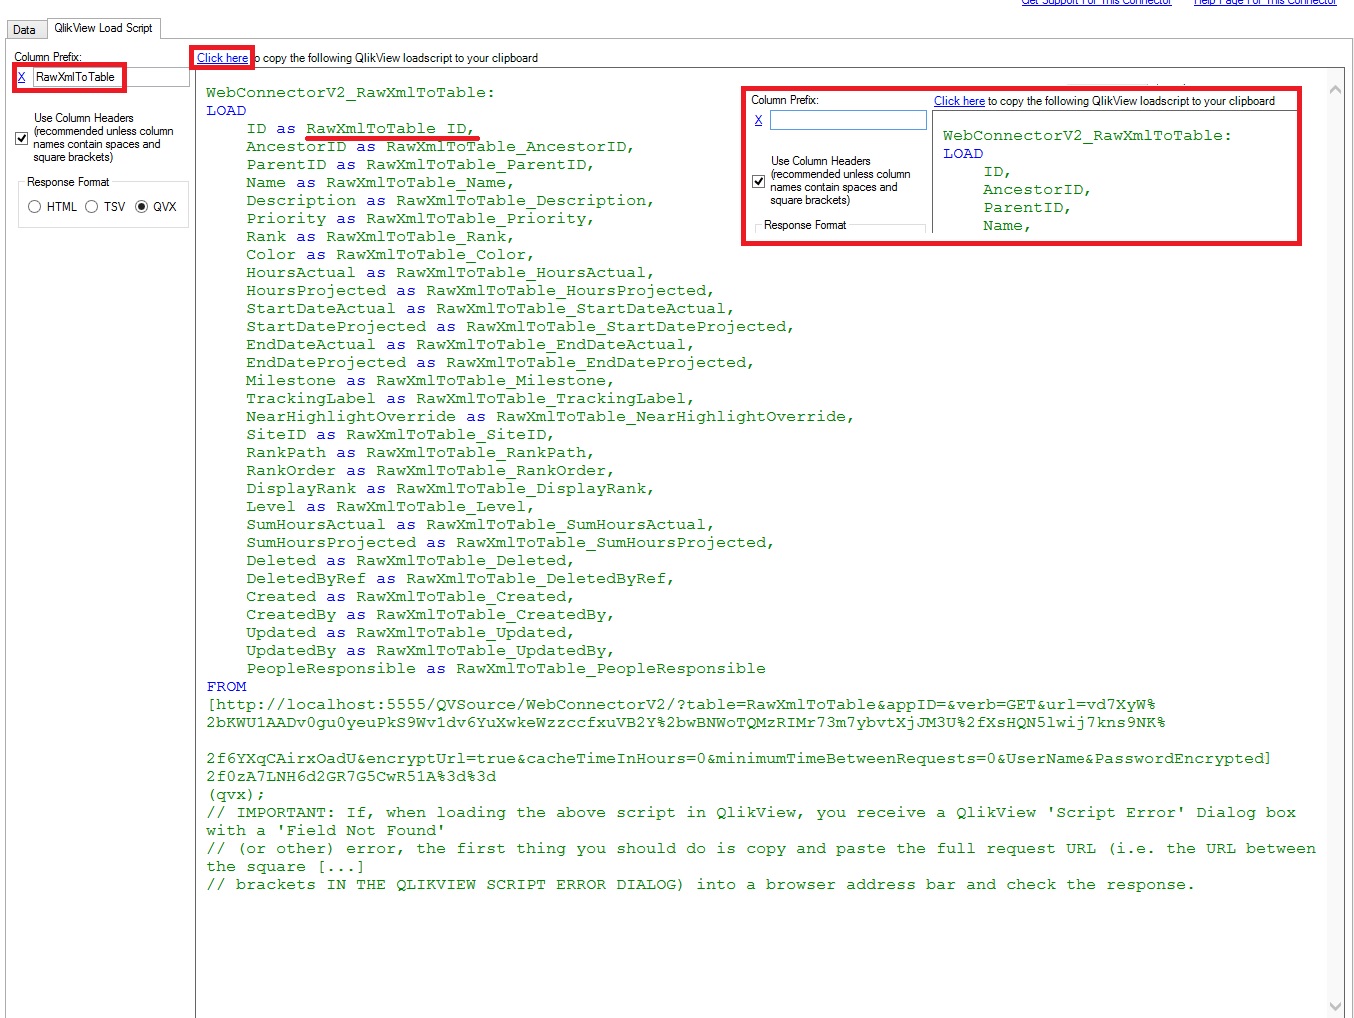
This page is the script that we need to copy and past into the script manager for QlikView. Before we get to that point if you look at the first box on the left. You are given the option to input a custom "Column Prefix", the default is "RawXmlToTable", you can see where it is added to the column name by looking for the section that has the red underline. For this demo I will be leaving it on the default. However if you would like to change it feel free. On the right hand side in the red box there is a smaller screen shot of what it looks like without the prefix.
Once you are satisfied with your prefix click on the blue words that say "Click here". This will copy the script into your clipboard and allow you to past it into the script editor in QlikView. We are now finished with QVSource, however don't close it we will need it open to handle the connection to the API.
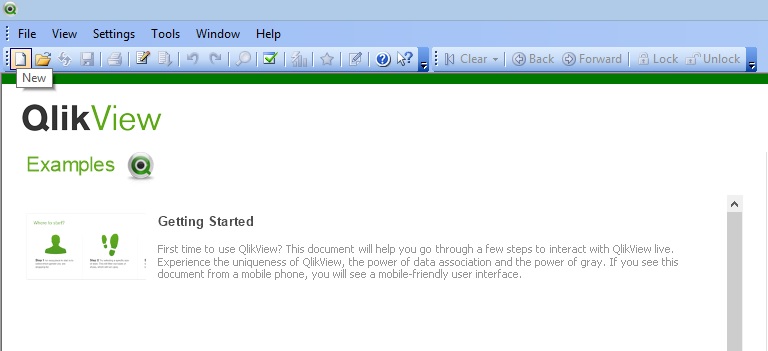
Now launch QlikView and click the new button or go to "file" > "New" to make a new document.
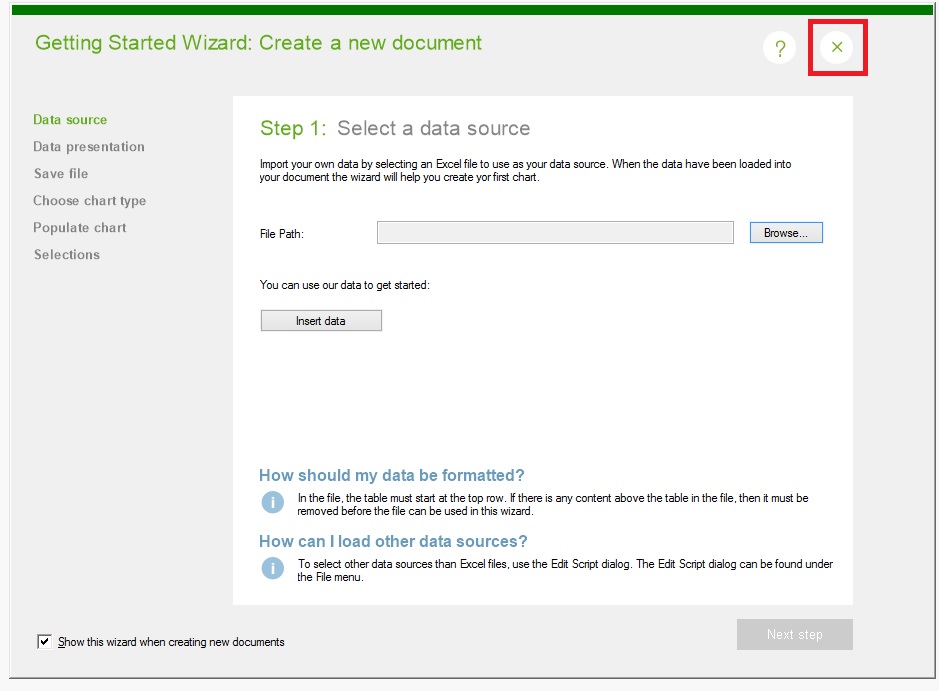
This will bring up a wizard. We won't be using the wizard so just click the X to close it.
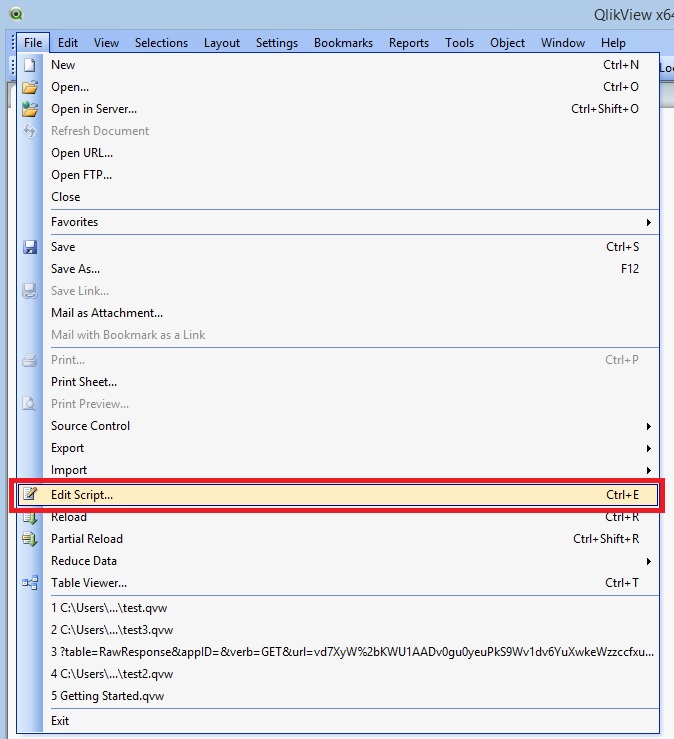
Once the new document is open we will need to edit the script. For this go to "File" > "Edit Script", or you can use the shortcut Ctrl + E.
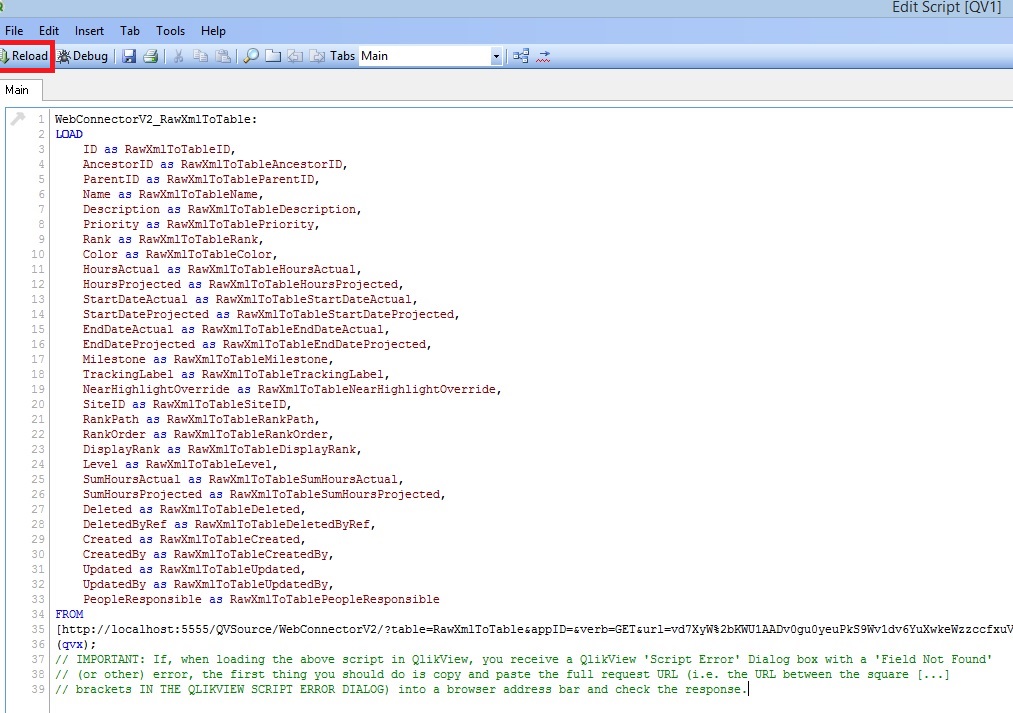
Once the script window is open just paste the script you copied from QVSource into the window. You can paste it just below the Set statements. The set statements set how numbers and dates are displayed. These settings are based on your computer settings. After the script is pasted into the window, click the "Reload" button. This will bring up a box asking you to save the document. Save it wherever you would like.
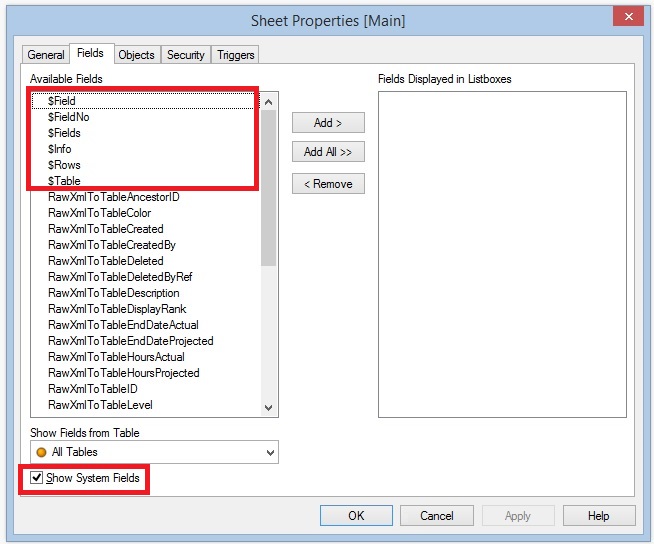
This will bring you to a "Sheet Properties" box. The main things we need to concern ourselves with are the red boxes. The fields with "$"are system fields, if you want to include them you can. Adding these fields will not cause any problems. However adding these fields to your Listboxes can cause unintended results. If you wish to remove them you can uncheck the box "Show System Fields" which will remove them from the display or you can manually not add them to the "Fields Displayed in Listboxes". Once you have added all the fields you want in your Listboxes to the right column, click ok and we will move on.
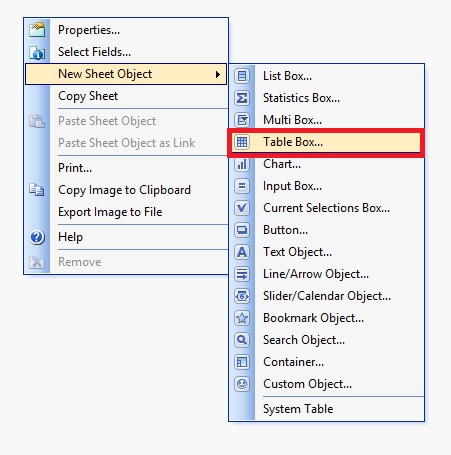
Now that we have the script and fields loaded we need to make a table. Right click anywhere in the document, go to "New Sheet Object" and select "Table Box..."
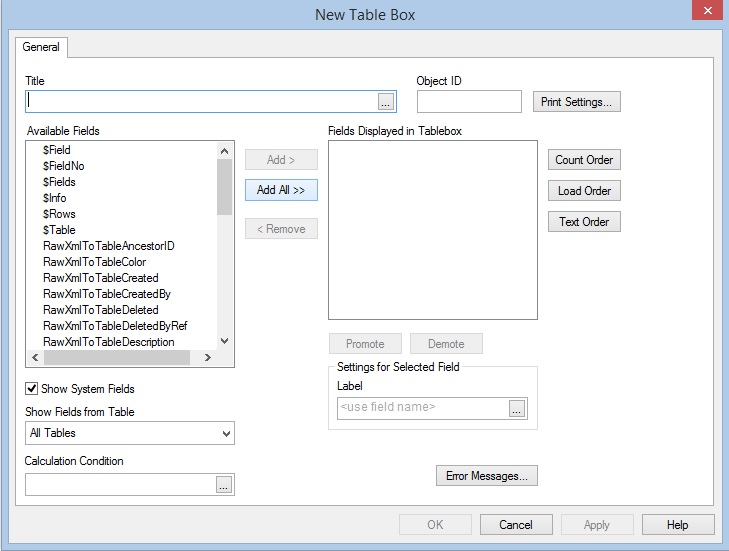
This will bring up a menu similar to the "Sheet Properties". You can give your new Table box a name if you want and select the fields you wish to add. As you can see I have the system fields in mine. I simply removed each one after selecting "Add All". Once you have all the fields the way you would like click ok to create your table box.
Your table will probably be much shorter than the one in the screen shot. Simply grab it in the corner and drag it out to the length you would like. Congratulations on your first import into QlikView.

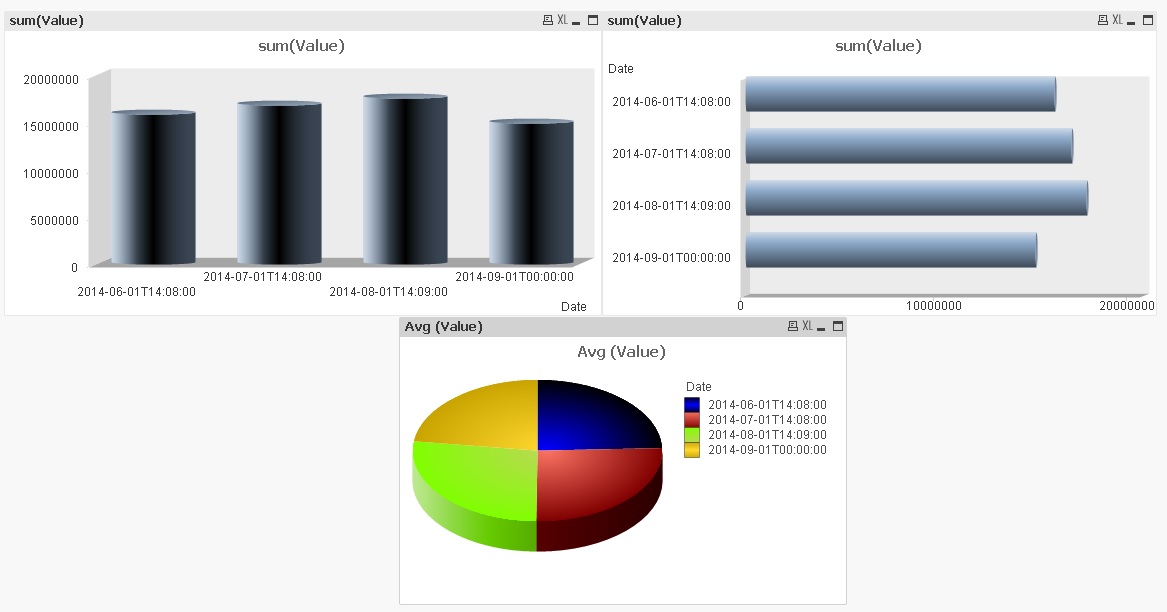
Try making some charts. These are some very simple examples of the charts you can make. You can feel free to keep them simple or go as complex as you like.